We’re going to start with the background. Despite being an art major, I did not paint the background myself. I stole it straight out of YPP using a screen shot. I myself use Screen Hunter for captures. I’m having a little trouble making the game show me the background I use so I can make this tutorial, so I’m going to make a new one. Feel free to use it if it comes out alright.
I start out by going into the game and taking a screen shot. I have my screen shot program set to rectangle so when I hit print screen I can marquee select just the area I want. This time I took the whole thing, but that’s not going to fit on here, so we’re going to pretend I only took the section I want. Now, sadly the next step in getting a background right is to open it in an image editing program. I use Corel 9 at home, but have access to the latest Photoshop at school.
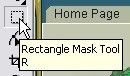
So I open my image editor and then load my screen shot into it. I’ve set my screen shot hunter to store the images in a folder called Puzzle Pirates under My Documents. Yours will be wherever you told yours to store. I’ve decided I liked the stripes on the blockades tab of the notice board, so I took a shot of it and then loaded it into my editor. I select my rectangle mask tool.
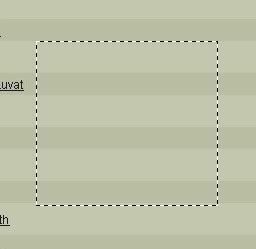
And then I just marquee select the area, since I didn’t do it when I took the shot originally. If you used the rectangle too to do that, then there’s still the getting it just right, so I’ll go ahead and skip to that step. They’re stripes and we want them to tile correctly so I if end at the bottom of a dark one at the top of my selection I want the bottom of the selection to be at the top of a dark stripe. You want it as close as you can get it so you won’t have every third stripe wider than the others. Unless that’s the look you want to go for, but in this case I’m assuming it’s not. Everyone’s editor is going to be a bit different, in Corel I just tell it to crop to mask and I have my background all ready to go. It doesn’t matter if it’s a perfect square or anything for a background because it’ll tile. As long as our stripes are going to match up on top and bottom like I mentioned above then the sides are going to as well.
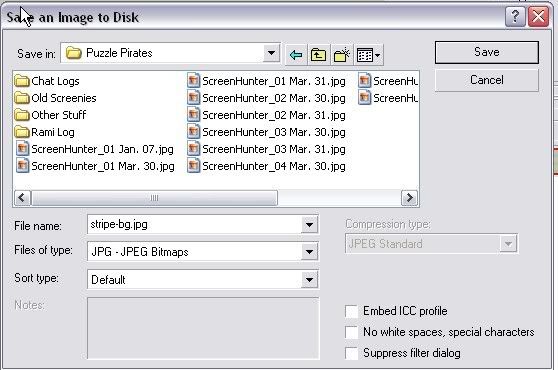
So I save the image as a JPEG file on somewhere on my computer. In this case I put it in my folder I’d made called Puzzle Pirates where all my YPP screen shots go just so it’d be easy for me to find again. Now I need to load it to a host.
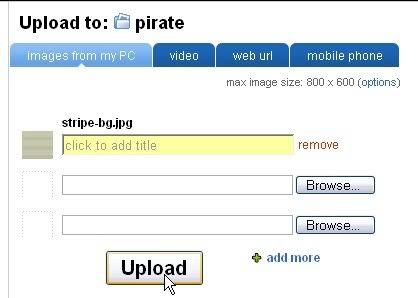
I use Photobucket, because I find them to be very reliable and I’ve used them for years. Once you go to the website (by clicking the name in the last sentence) you can login or register. It’s free to register so don’t worry about that. If you have some other host don’t worry about any of this and just use whatever you normally use. Otherwise login on Photobucket. I’m super organized so even my Photobucket has different folders for different things. I have album I called pirate to use for Rami’s log. So I open that album. You don’t need to do that though you can just upload straight into the page it takes you to when you log in.

You’ll see a little section at the top to the right. You’ll need to click the brouse button and then navigate to where you have saved your image on your PC (or Mac or whatever.)
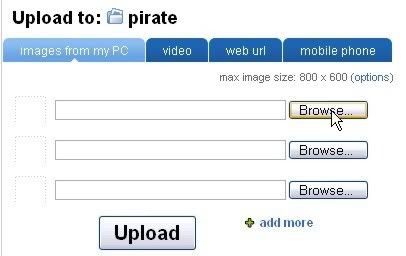
After you’ve found the image, and clicked Open you’ll need to Upload it by clicking the Upload button on Photobucket. Then you just wait for it to load or whatever it’s doing and scroll down below the area where you upload. You should see it there. The great thing about Photobucket is that is already has the code you need to add your image to the web, either on forums or on blogger with HTML.
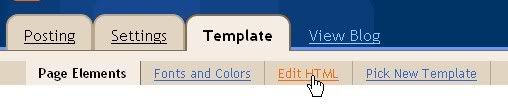
So now that our image is loaded, we go back to our blogger account and login there if we haven’t already. Once at the dashboard we can quickly move to where we need to go by clicking the Layout link to the blog we want to add our new background to.

Now that took us to where we can arrange our page elements, but that’s not exactly what we’re looking for so at the tabs of the top of the page, find the one where we edit the blog’s HTML.
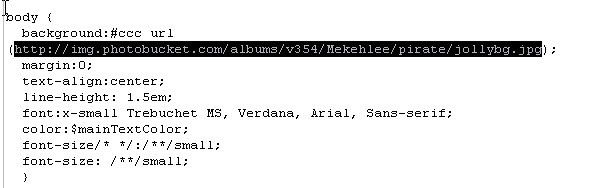
This is where it can get complicated for anyone that doesn’t know HTML. We have to find the code that tells out background what to be. It might be a little different for each type of template, so good luck. You could mess things up here if you don’t know what you’re doing. In my case it’s near the top and the first line of code under the BODY tag. So I highlight what is already there in the parentheses without getting the parentheses themselves. You need those for the code. You only want to replace what’s inside, so highlight and delete. Yours won’t be the same as mine, since mine is already my own personal background and the image is different for different templates.
I hope you didn’t close Photobucket. You’ll need both windows open at the same time. Go back to the window or tag Photobucket is open in and find the URL for the image we just uploaded. You should just be able to click in the little tag box once and the whole code will be copied for you. Normally on my screen I get a little yellow box that says, “copied” but I didn’t get that this time so just to make sure I right clicked and said copy.
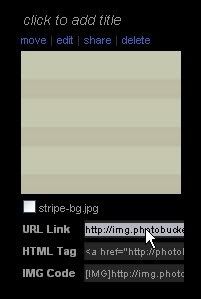
Now we go back to the page we have our blogger html open on and paste what we just coppied into that space between the parentheses where the last image was. If you clicked the HTML code or the IMG code then you’ve got too much information and your blogger won’t know what to do with it. And remember for the code to work you have to have those parentheses and the semicolon after them still in place.

Now just click on Save Template and your background should be there.

Now click on view blog to make sure it all went alright. Mine didn’t. I screwed mine up and lost more than half my color, but yours should have worked just fine as mine had originally. I think I deleted too much code accidentally when I deleted my parentheses on accident and had to add them back. Which is why I caution strongly about only deleting what’s inside them. Ah, found my problem, in the above image (if I took it) I have a space between the URL and first parentheses. Can’t have that. Also if you don’t like the way you got your image edited just right, then my code is above, just use my image straight from where it is.
I was going to also show you how to add images like I did in Pic of the Day section of my blog, but I’ve already written so much, so I’ll do that one tomorrow. And I’ll link any tutorials I do in an element on the side so you won’t have to dig through the archives to find them. However the striped background we created above isn’t going to be up on my log forever, so if you’re reading this well after it was published you won’t see the example of how the background looks.
No comments:
New comments are not allowed.